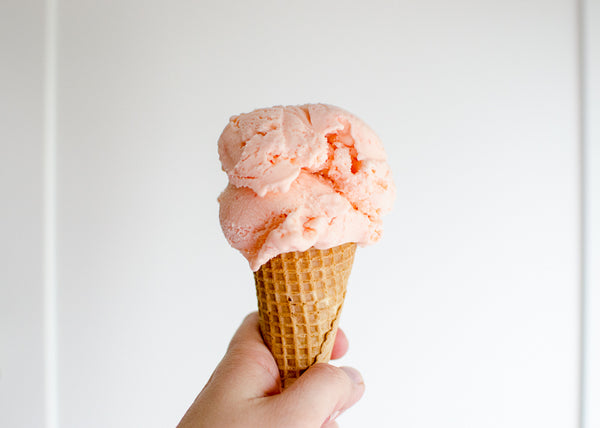
Smooth and Creamy Bubblegum Ice Cream

It’s National Ice Cream Day! Possibly the best holiday of the year? Ice cream is pretty much my favorite of all time. I love it for so many reasons. Obviously because it is the most delicious treat. It also makes all other treats even better. Cake and ice cream. Pie and ice cream. Brownie sundaes. Fruit plus ice cream. Donuts and ice cream. Need I go on?
I got my first ice cream maker I believe in my early years of college. It was not the old crank style, but it still required rock salt. You put the mixture in the metal tub, then surround the tub in ice and rock salt. Plug it in to let it churn. It was super loud. I remember how disappointed I was the first time we tried making our own. We made our mixture up, then got to the part where it said we needed to let it chill overnight. What?
I now have one of the makers where you need to let the bowl freeze in the freezer for 24 hours. So making ice cream is quite the process. Well, if you want it to turn out really good. Which I do because I am a self-declared ice cream snob. The entire process to smooth and creamy premium ice cream is a fairly involved and delicate process. I am still learning how to perfect it every time. Recently, I feel like I am truly understanding the process and getting consistent results.
For my daughter’s second birthday, we had a bubble themed party. So naturally, I made bubblegum ice cream. I scoured the internet trying to find a good recipe. I believe the best recipes involve egg yolks, and a standard custard-base process. None of the recipes I found laid out those steps, and I just knew they would turn out “icy.” Icy ice cream is the worst. So I did what I have never done in my 10 years of learning to make ice cream. I made my own recipe! It turned out so good. It was perfectly smooth and creamy. Perhaps a tad too sweet. I would make a couple adjustments if I made it again. I have noted those below.
So here it is, Leitia’s first original ice cream recipe. My ice cream obsessed self is pretty proud, and now I feel brave enough to experiment more in the future.
Here are the simple ingredients:

I like to get as much set up done as possible prior to heating my cream. Otherwise I will scald the cream mixture. Multitasking is not my specialty, and ice cream requires constant stirring.
My set up looks like this:
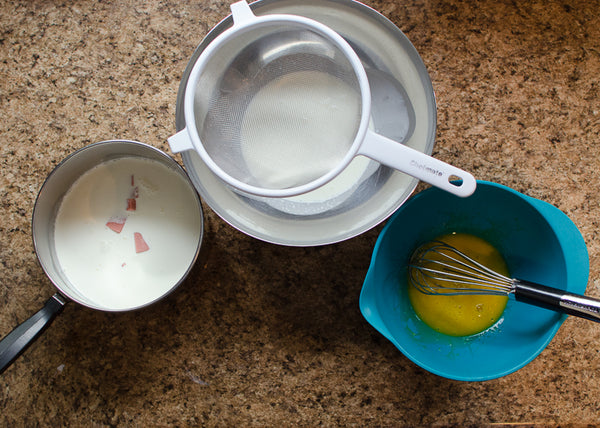
Place egg yolk in medium bowl, and whisk. Place half the heavy cream in large metal bowl with fine mesh whisk on top. Put 1 cup cream, milk, sugar, salt and the bubblegum pieces (unwrapped) in medium sauce pan. I used 20 Bubble Yum brand. The flavor was very sweet and strong so I recommend using 15 pieces instead. Use Bubble Yum, Bubblelicious, or Double Bubble.
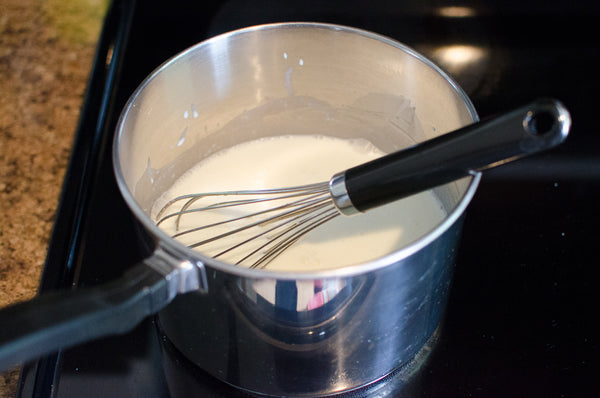
Now you are ready to turn on the heat. Warm the milk, sugar, 1 cup of heavy cream, pinch of salt, and bubblegum in a medium saucepan. Whisk together until sugar and gum is dissolved. There will be some gum pieces remaining, but you will strain those out later.
Once warm, pour one cup of the mixture into the egg yolks. You have to do this slowly and whisk constantly. The eggs need to warm/cook very slowly so as not to get hard, and turn into chunks of cooked egg. Pour one more cup whisking constantly.
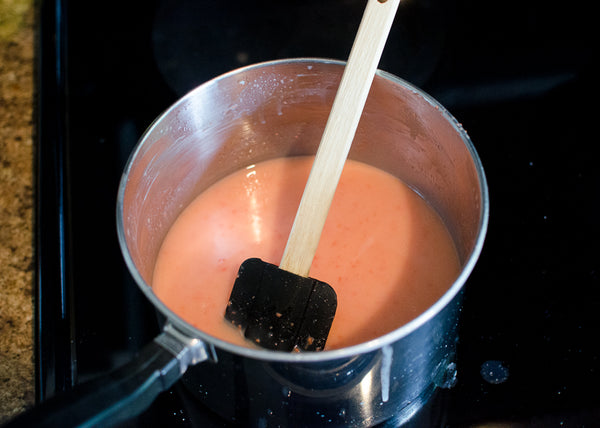
Now pour entire mixture back into saucepan. Warm and constantly stir over medium heat as mixture thickens. It is done when the mixture coats a spatula. The trick is to run your finger across the spatula. If the liquid keep it space, instead of running back together, it is done. See photo for example:

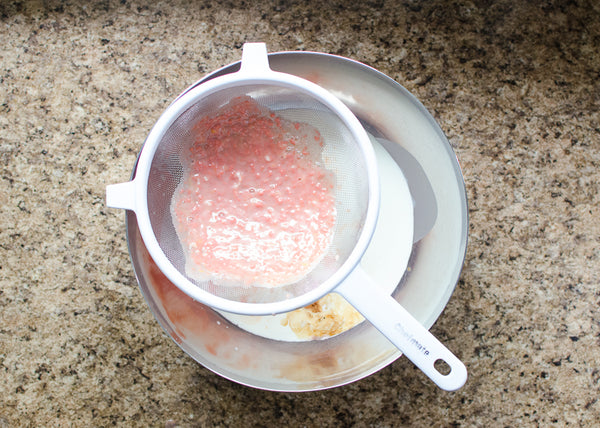
Now pour mixture over fin mesh strainer into heavy cream to remove any remaining bubblegum and egg pieces.
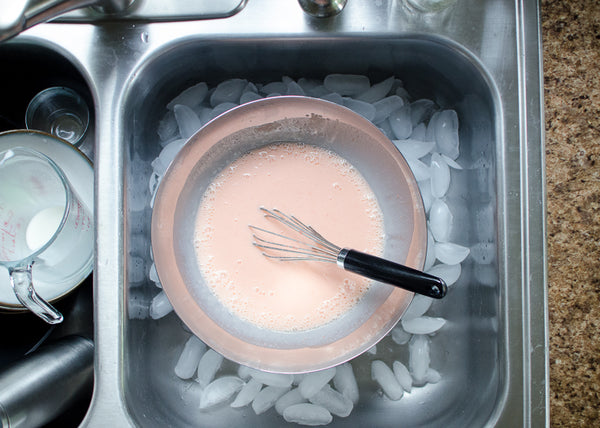
Place bowl into an ice bath. I do this by filling my sink basin with ice, and placing my metal bowl inside. Whisk in vanilla and optional food coloring. I really did not want to add food coloring to mine, but it turns out a pretty awful yellow color. I added a couple drops pink dye to make it look more like bubblegum. Stir over ice bath until cool.
Place mixture in refrigerator until completely cooled. I always do overnight. If you rush this, your ice cream will not churn properly.
Church in your ice cream maker. You could add chopped bubble gum pieces as it finishes churning like the bubblegum ice cream you remember from your childhood. Personally, I always loved the flavor, but hated the chunks of bubble gum. Who wants to chew gum while eating ice cream? Not me.
Enjoy! Let me know if you make this, and how you like it!

INGREDIENTS
- 2 cups heavy cream
- 1 cup whole milk
- ½ cup sugar
- 4 large egg yolks
- Pinch of salt
- 15 pieces bubblegum
- 1 teaspoon vanilla extract
- (optional) red or pink food coloring
INSTRUCTIONS
1. Pour one cup of heavy cream into a large, preferably metal bowl. Place a fine mesh strainer on top and set aside. Whisk egg yolks in a heat proof bowl. Set aside.
2. Warm the milk, sugar, 1 cup of heavy cream, pinch of salt, and bubblegum in a medium saucepan over medium heat. Whisk together until sugar and gum is dissolved. There will be some small pieces that remain.
3. Once warm, pour about one cup of warmed mixture into the egg yolks whisking constantly. Add another cup and whisk. Pour entire mixture back into the saucepan.
4. Stir mixture constantly over medium heat with a heat proof spatula, scraping the bottom as you stir, until the mixture thickens and coats the spatula.
5. Pour the mixture through the fine mesh strainer into the heavy cream. Stir in the vanilla and optional food coloring. Stir and cool over an ice bath. Chill thoroughly in refrigerator at least 5 hours, preferably overnight.
6. Freeze the ice cream according to the manufacturer's instructions.
7. Eat right away or freeze for a few additional hours in your freezer.